Sending events and reading data
In the real world, the human/dog counting camera would start to take pictures, count beings, and send that data to EdgeX. To simulate this activity in this section of the walkthrough, you will make core data API calls as if you were the camera's device and device service. That is, you will report human and dog counts to core data in the form of event/reading objects.
Send an Event/Reading
See core data API for more details.
Data is submitted to core data as an Event object. An event is a collection of
sensor readings from a device (associated to a device by its ID or name)
at a particular point in time. A Reading object in an Event object is a particular
value sensed by the device and associated to a Value
Descriptor (by name) to
provide context to the reading.
So, the human/dog counting camera might
determine that there are 5 people and 3 dogs in the space it is
monitoring. In the EdgeX vernacular, the device service upon receiving
these sensed values from the camera device would create an Event with two
Readings - one Reading would contain the key/value pair of HumanCount:5
and the other Reading would contain the key/value pair of CanineCount:3.
The device service, on creating the Event and associated Reading objects
would transmit this information to core data via REST call.
Walkthrough - Send Event
Use either the Postman or Curl tab below to walkthrough sending an Event with Readings to core data.
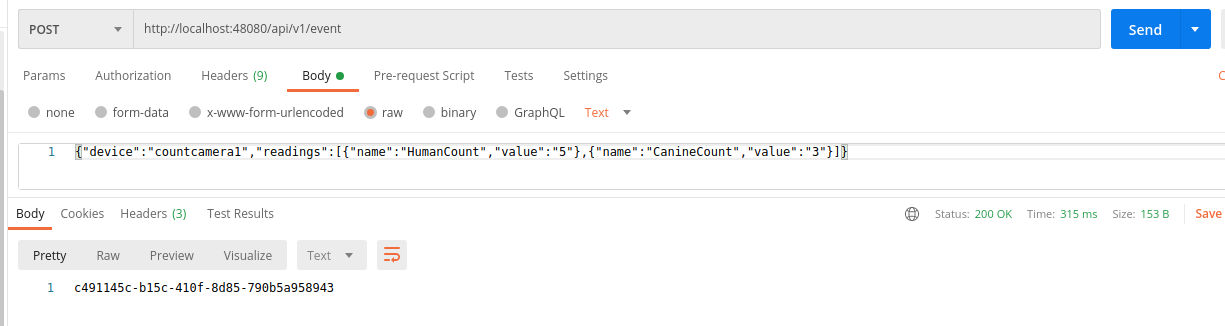
Make a POST request to http://localhost:48080/api/v1/event with the body below.
{"device":"countcamera1","readings":[{"name":"HumanCount","value":"5"},{"name":"CanineCount","value":"3"}]}
If your API call is successful, you will get a generated ID (a UUID) for your new Event as shown in the image below.
Make a curl POST request as shown below.
curl -X POST -d '{"device":"countcamera1","readings":[{"name":"HumanCount","value":"5"},{"name":"CanineCount","value":"3"}]}' localhost:48080/api/v1/event
Origin Timestamp
If desired, the device service can also supply an origin property in the Event or Reading object to suggest the time (in Epoch
timestamp/milliseconds format) at which the data was sensed/collected.
If an origin is not provided, no origin will be set for the Event or
Reading. However, every Event and Reading is provided a Created and
Modified timestamp by the database when it is saved to give the data some time context.
{"device":"countcamera1","origin":1471806386919, "readings":[{"name":"HumanCount","value":"1","origin":1471806386919},{"name":"CanineCount","value":"0","origin":1471806386919}]}
Note
Smart devices will often timestamp sensor data and this timestamp can be used as the origin timestamp. In cases where the sensor/device is unable to provide a timestamp ("dumb" or brownfield sensors), it is recommended that the device service create a timestamp for the sensor data that it be applied as the origin timestamp for the device.
Exploring Events/Readings
Now that an Event (or two) and associated Readings have been sent to
core data, you can use the core data API to explore that data that is
now stored in the database.
Recall from a previous walkthrough step, you checked that no data was yet stored in core data. Make a similar call to see event records have now been sent into core data..
Walkthrough - Query Events/Readings
Use either the Postman or Curl tab below to walkthrough getting the list of events.
Make a GET request to retrieve 10 of the last Events associated to the countcamera1 device: http://localhost:48080/api/v1/event/device/countcamera1/10.
Make a GET request to retrieve 10 of the human count Readings associated to the countcamera1 device: http://localhost:48080/api/v1/reading/name/HumanCount/10
Make a curl GET requests to retrieve 10 of the last Events associated to the countcamera1 device and to retrieve 10 of the human count readings associated to countcamera1
curl -X GET localhost:48080/api/v1/event/device/countcamera1/10 | json_pp
curl -X GET localhost:48080/api/v1/reading/name/HumanCount/10 | json_pp