C SDK
In this guide, you create a simple device service that generates a random number as a means to simulate getting data from an actual device. In this way, you explore some of the SDK framework and work necessary to complete a device service without actually having a device to talk to.
Install dependencies
See the Getting Started - C Developers guide to install the necessary tools and infrastructure needed to develop a C service.
Get the EdgeX Device SDK for C
The next step is to download and build the EdgeX device service SDK for C.
-
First, clone the device-sdk-c from Github:
git clone -b v1.2.1 https://github.com/edgexfoundry/device-sdk-c.git
cd ./device-sdk-c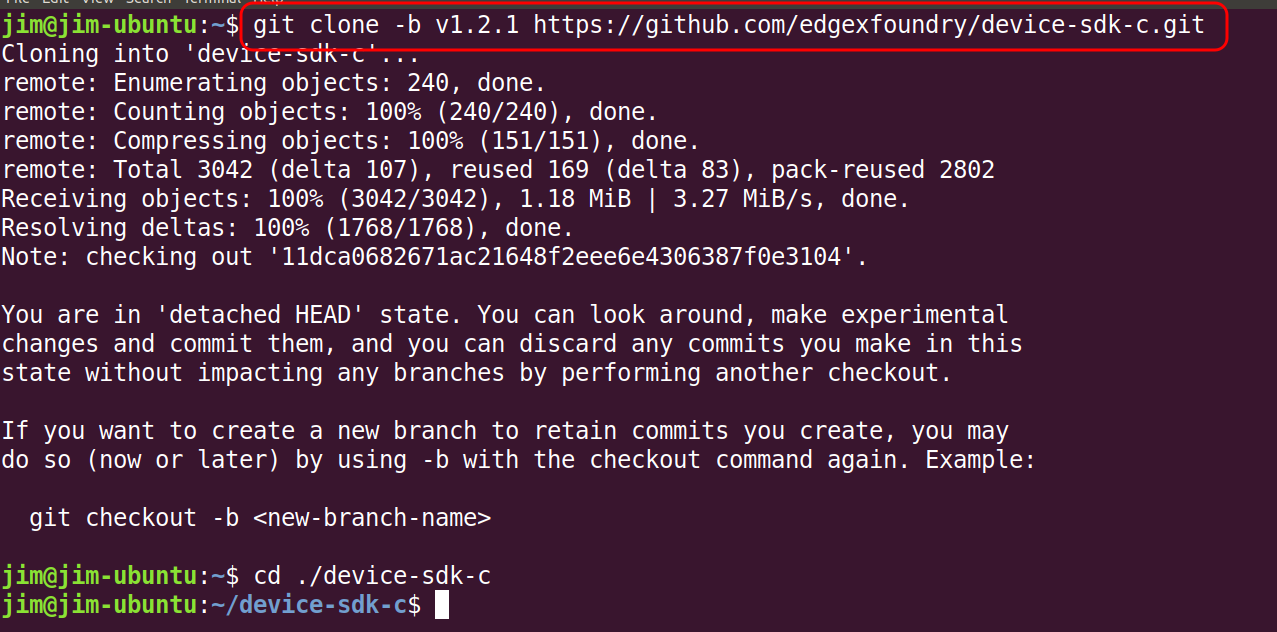
Note
The clone command above has you pull v1.2.1 of the C SDK which is the version compatible with the Geneva release. There are later releases of EdgeX. While backward compatible, it is always a good idea to pull and use the latest version associated with the major version of EdgeX you are using.
-
Then, build the device-sdk-c:
make
Starting a new Device Service
For this guide, you use the example template provided by the C SDK as a starting point for a new device service. You modify the device service to generate random integer values.
Begin by copying the template example source into a new directory
named example-device-c:
mkdir -p ../example-device-c/res
cp ./src/c/examples/template.c ../example-device-c
cd ../example-device-c

Build your Device Service
Now you are ready to build your new device service using the C SDK you compiled in an earlier step.
-
Tell the compiler where to find the C SDK files:
export CSDK_DIR=../device-sdk-c/build/release/_CPack_Packages/Linux/TGZ/csdk-1.2.1Note
The exact path to your compiled CSDK_DIR may differ depending on the tagged version number on the SDK. The version of the SDK can be found in the VERSION file located in the ./device-sdk-c/VERSION file. In the example above, the Geneva release of 1.2.1 is used.
-
Now build your device service executable:
gcc -I$CSDK_DIR/include -L$CSDK_DIR/lib -o device-example-c template.c -lcsdkIf everything is working properly, a
device-example-cexecutable will be created in the directory.
Customize your Device Service
Up to now you've been building the example device service provided by
the C SDK. In order to change it to a device service that generates
random numbers, you need to modify your template.c method
template_get_handler. Replace the following code:
for (uint32_t i = 0; i < nreadings; i++)
{
    /* Log the attributes for each requested resource */
    iot_log_debug (driver->lc, "  Requested reading %u:", i);
    dump_nvpairs (driver->lc, requests[i].attributes);
    /* Fill in a result regardless */
    readings[i].type = String;
    /* NB String (and binary) readings get deallocated in the SDK */
    readings[i].value.string_result = strdup ("Template result");
}
return true;
with this code:
for (uint32_t i = 0; i < nreadings; i++)
{
    const char *rdtype = edgex_nvpairs_value (requests[i].attributes, "type");
    if (rdtype)
    {
        if (strcmp (rdtype, "random") == 0)
        {
        /* Set the resulting reading type as Uint64 */
        readings[i].type = Edgex_Uint64;
        /* Set the reading as a random value between 0 and 100 */
        readings[i].value.ui64_result = rand() % 100;
        }
        else
        {
        iot_log_error (driver->lc, "Unknown sensor type \"%s\" requested", rdtype);
        return false;
        }
    }
    else
    {
        iot_log_error (driver->lc, "Unable to read value, no \"type\" attribute given");
        return false;
    }
}
return true;
Creating your Device Profile
A device profile is a YAML file that describes a class of device to EdgeX. General characteristics about the type of device, the data these devices provide, and how to command the device are all in a device profile. The device profile tells the device service what data gets collected from the the device and how to get it.
Follow these steps to create a device profile for the simple random number generating device service.
-
Explore the files in the device-sdk-c/src/c/examples/res folder. Note the example TemplateProfile.yaml device profile that is already in this folder. Open the file with your favorite editor and explore its contents. Note how
deviceResourcesin the file represent properties of a device (properties like SensorOne, SensorTwo and Switch). Similarly,coreCommandsspecify commands that get issued to the device.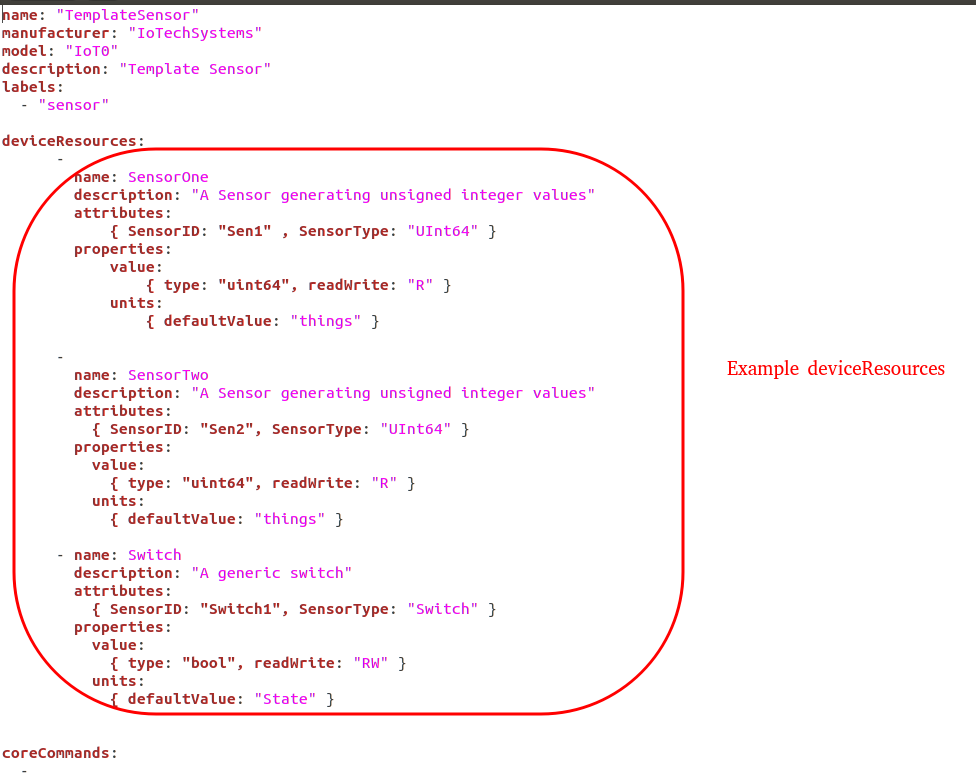
-
A pre-created device profile for the random number device is provided in this documentation. Download random-generator-device.yaml and save the file to the
./resfolder. -
Open the random-generator-device.yaml file in a text editor. In this device profile, the device described has a deviceResource:
randomnumber. Note how the association of a type to the deviceResource. In this case, the device profile informs EdgeX thatrandomnumberwill be a INT32. In real world IoT situations, this deviceResource list could be extensive and filled with many deviceResources all different types of data. Note also how the device profile describes a REST command (GET Random) to call to get the random number from the device service.
Configuring your Device Service
Now update the configuration for the new device service. This documentation provides a new configuration.toml file. This configuration file: - changes the port the service operates on so as not to conflict with other device services - alters the the auto event frequency, which determines when the device service collects data from the simulated device (every 10 seconds) - sets up the initial provisioning of the random number generating device when the service starts
Download configuration.toml and save the file to the ./res folder.
Rebuild your Device Service
Now you have your new device service, modified to return a random number, a device profile that will tell EdgeX how to read that random number, as well as a configuration file that will let your device service register itself and its device profile with EdgeX, and begin taking readings every 10 seconds.
Rebuild your Device Service to reflect the changes that you have made:
gcc -I$CSDK_DIR/include -L$CSDK_DIR/lib -o device-example-c template.c -lcsdk
Run your Device Service
Allow your newly created Device Service, which was formed out of the Device Service C SDK, to create sensor mimicking data which it then sends to EdgeX.
-
Follow the Getting Started with Docker guide to start all of EdgeX. From the folder containing the docker-compose file, start EdgeX with the following call:
docker-compose up -d -
Back in your custom device service directory, tell your device service where to find the
libcsdk.so:export LD_LIBRARY_PATH=$CSDK_DIR/lib -
Run your device service:
./device-example-c -
You should now see your device service having its /Random command called every 10 seconds. You can verify that it is sending data into EdgeX by watching the logs of the
edgex-core-dataservice:docker logs -f edgex-core-dataWhich would print an event record every time your device service is called.
-
You can manually generate an event using curl to query the device service directly:
curl 0:49992/api/v1/device/name/RandNum-Device01/randomnumber -
Using a browser, enter the following URL to see the event/reading data that the service is generating and sending to EdgeX:
http://localhost:48080/api/v1/event/device/RandNum-Device01/100
This request asks core data to provide the last 100 events/readings associated to the RandNum-Device-01.