Golang SDK
In this guide, you create a simple device service that generates a random number as a means to simulate getting data from an actual device. In this way, you explore some SDK framework and work necessary to complete a device service without actually having a device to talk to.
Install dependencies
See the Getting Started - Go Developers guide to install the necessary tools and infrastructure needed to develop a GoLang service.
Get the EdgeX Device SDK for Go
Follow these steps to create a folder on your file system, download the Device SDK, and get the GoLang device service SDK on your system.
-
Create a collection of nested folders,
~/edgexfoundryon your file system. This folder will hold your new Device Service. In Linux, create a directory with a single mkdir commandmkdir -p ~/edgexfoundry -
In a terminal window, change directories to the folder just created and pull down the SDK in Go with the commands as shown.
cd ~/edgexfoundry
git clone --depth 1 --branch v2.0.0 https://github.com/edgexfoundry/device-sdk-go.git
Note
The clone command above has you pull v2.0.0 of the Go SDK which is the version associated to Ireland. There are later releases of EdgeX, and it is always a good idea to pull and use the latest version associated with the major version of EdgeX you are using. You may want to check for the latest released version by going to https://github.com/edgexfoundry/device-sdk-go and look for the latest release.
-
Create a folder that will hold the new device service. The name of the folder is also the name you want to give your new device service. Standard practice in EdgeX is to prefix the name of a device service with
device-. In this example, the name 'device-simple' is used.mkdir -p ~/edgexfoundry/device-simple -
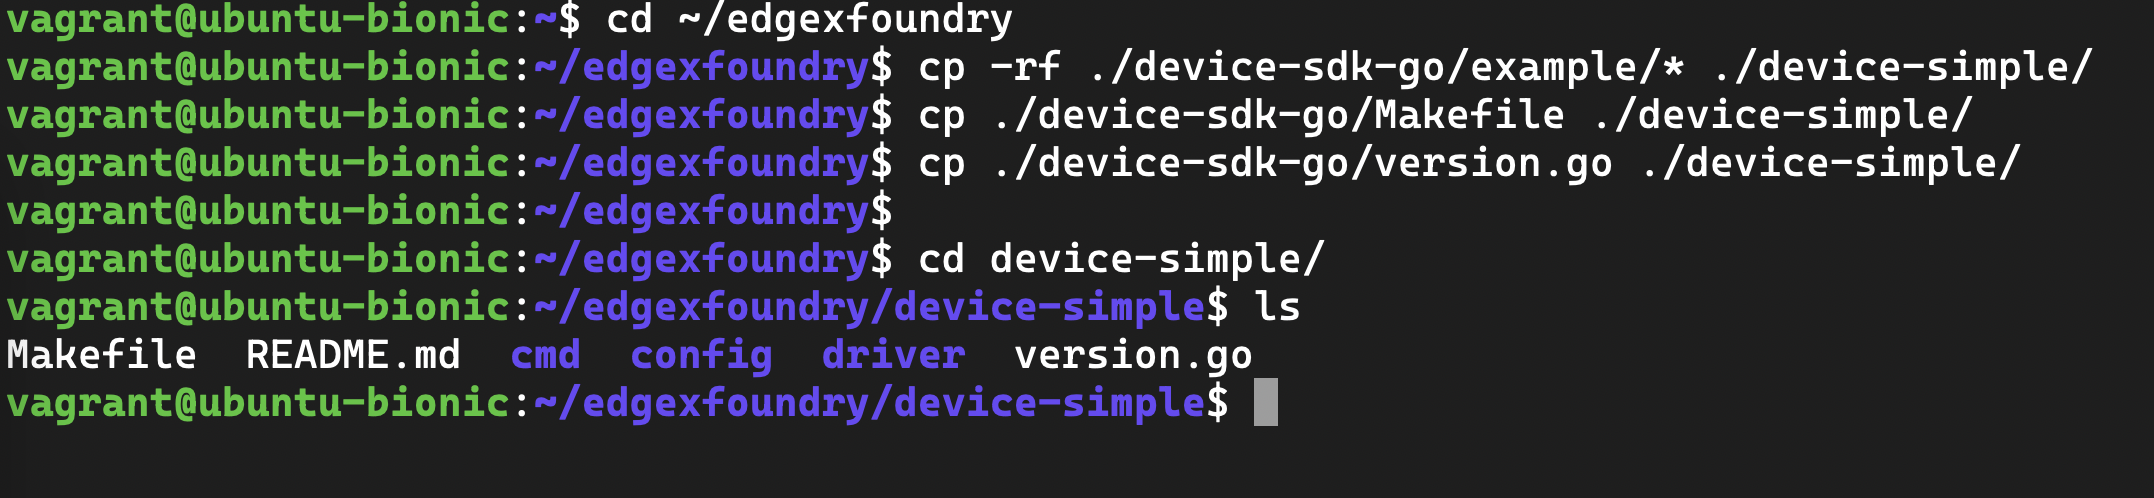
Copy the example code from device-sdk-go to device-simple:
cd ~/edgexfoundry cp -rf ./device-sdk-go/example/* ./device-simple/ -
Copy Makefile to device-simple:
cp ./device-sdk-go/Makefile ./device-simple - Copy version.go to device-simple:
cp ./device-sdk-go/version.go ./device-simple/
After completing these steps, your device-simple folder should look like the listing below.
Start a new Device Service
With the device service application structure in place, time now to program the service to act like a sensor data fetching service.
-
Change folders to the device-simple directory.
cd ~/edgexfoundry/device-simple -
Open main.go file in the cmd/device-simple folder with your favorite text editor. Modify the import statements. Replace
github.com/edgexfoundry/device-sdk-go/v2/example/driverwithgithub.com/edgexfoundry/device-simple/driverin the import statements. Also replacegithub.com/edgexfoundry/device-sdk-go/v2withgithub.com/edgexfoundry/device-simple. Save the file when you have finished editing.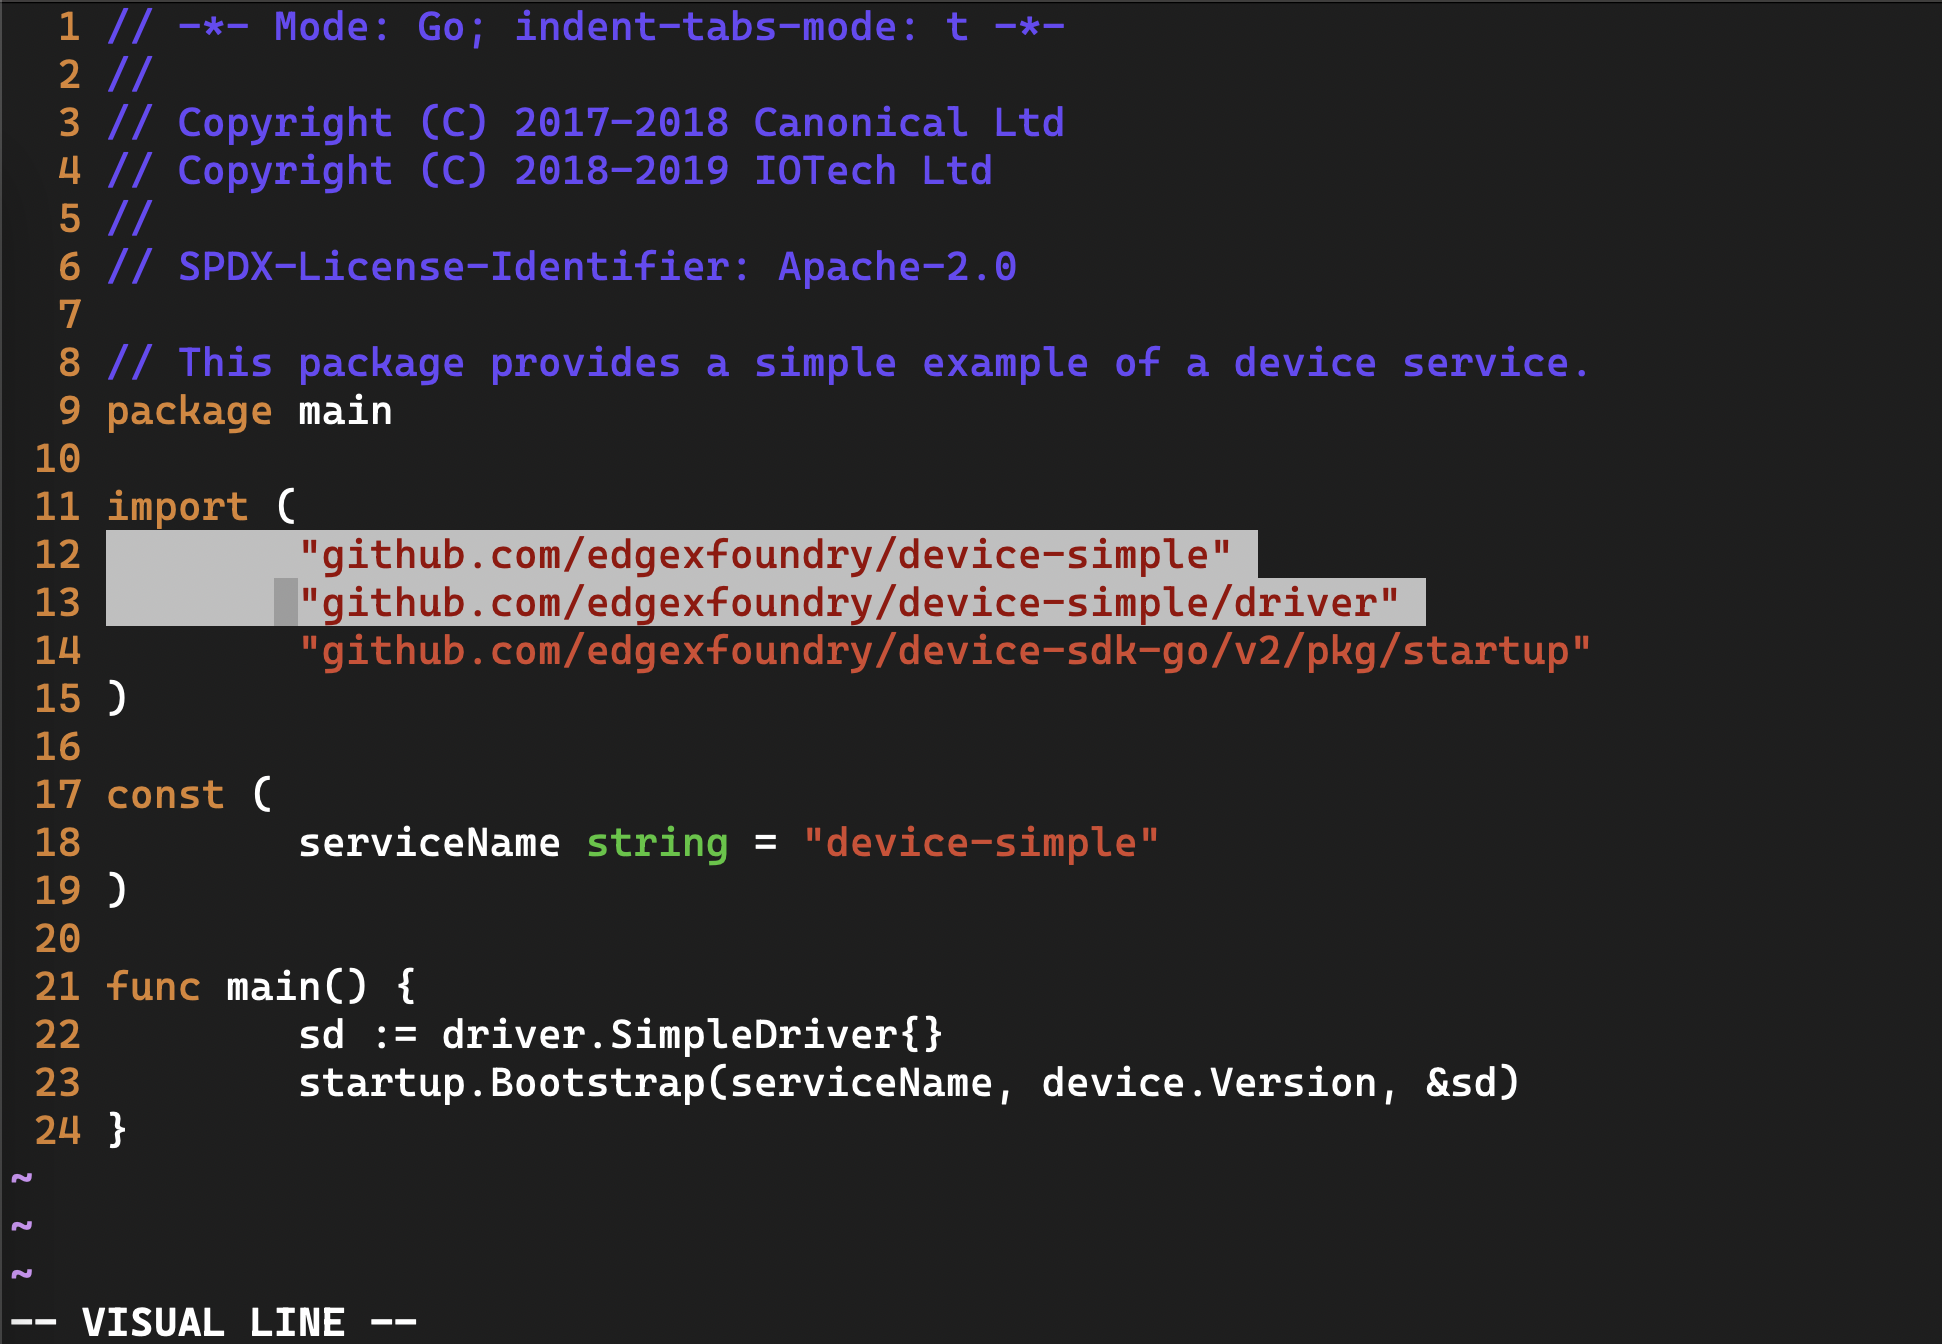
-
Open Makefile found in the base folder (~/edgexfoundry/device-simple) in your favorite text editor and make the following changes
-
Replace:
MICROSERVICES=example/cmd/device-simple/device-simplewith:
MICROSERVICES=cmd/device-simple/device-simple -
Change:
GOFLAGS=-ldflags "-X github.com/edgexfoundry/device-sdk-go/v2.Version=$(VERSION)"to refer to the new service with:
GOFLAGS=-ldflags "-X github.com/edgexfoundry/device-simple.Version=$(VERSION)" -
Change:
example/cmd/device-simple/device-simple:
  go mod tidy
  $(GOCGO) build $(GOFLAGS) -o $@ ./example/cmd/device-simple
to:
cmd/device-simple/device-simple:
  go mod tidy
  $(GOCGO) build $(GOFLAGS) -o $@ ./cmd/device-simple
-
-
Save the file.
-
Enter the following command to create the initial module definition and write it to the go.mod file:
GO111MODULE=on go mod init github.com/edgexfoundry/device-simple
-
Use an editor to open and edit the go.mod file created in ~/edgexfoundry/device-simple. Add the code highlighted below to the bottom of the file. This code indicates which version of the device service SDK and the associated EdgeX contracts module to use.
require (
    github.com/edgexfoundry/device-sdk-go/v2 v2.0.0
    github.com/edgexfoundry/go-mod-core-contracts/v2 v2.0.0
)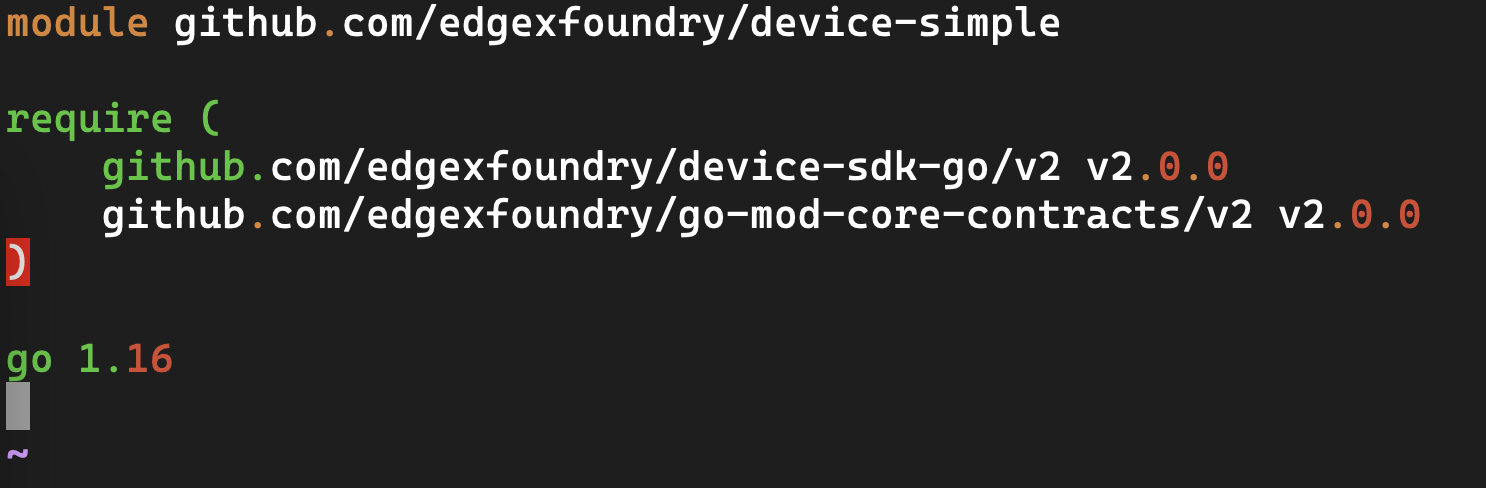
Note
You should always check the go.mod file in the latest released version SDK for the correct versions of the Go SDK and go-mod-contracts to use in your go.mod.
Build your Device Service
To ensure that the code you have moved and updated still works, build the device service. In a terminal window, make sure you are still in the device-simple folder (the folder containing the Makefile). Build the service by issuing the following command:
make build
If there are no errors, your service is ready for you to add custom code to generate data values as if there was a sensor attached.
Customize your Device Service
The device service you are creating isn't going to talk to a real device. Instead, it is going to generate a random number where the service would ordinarily make a call to get sensor data from the actual device.
-
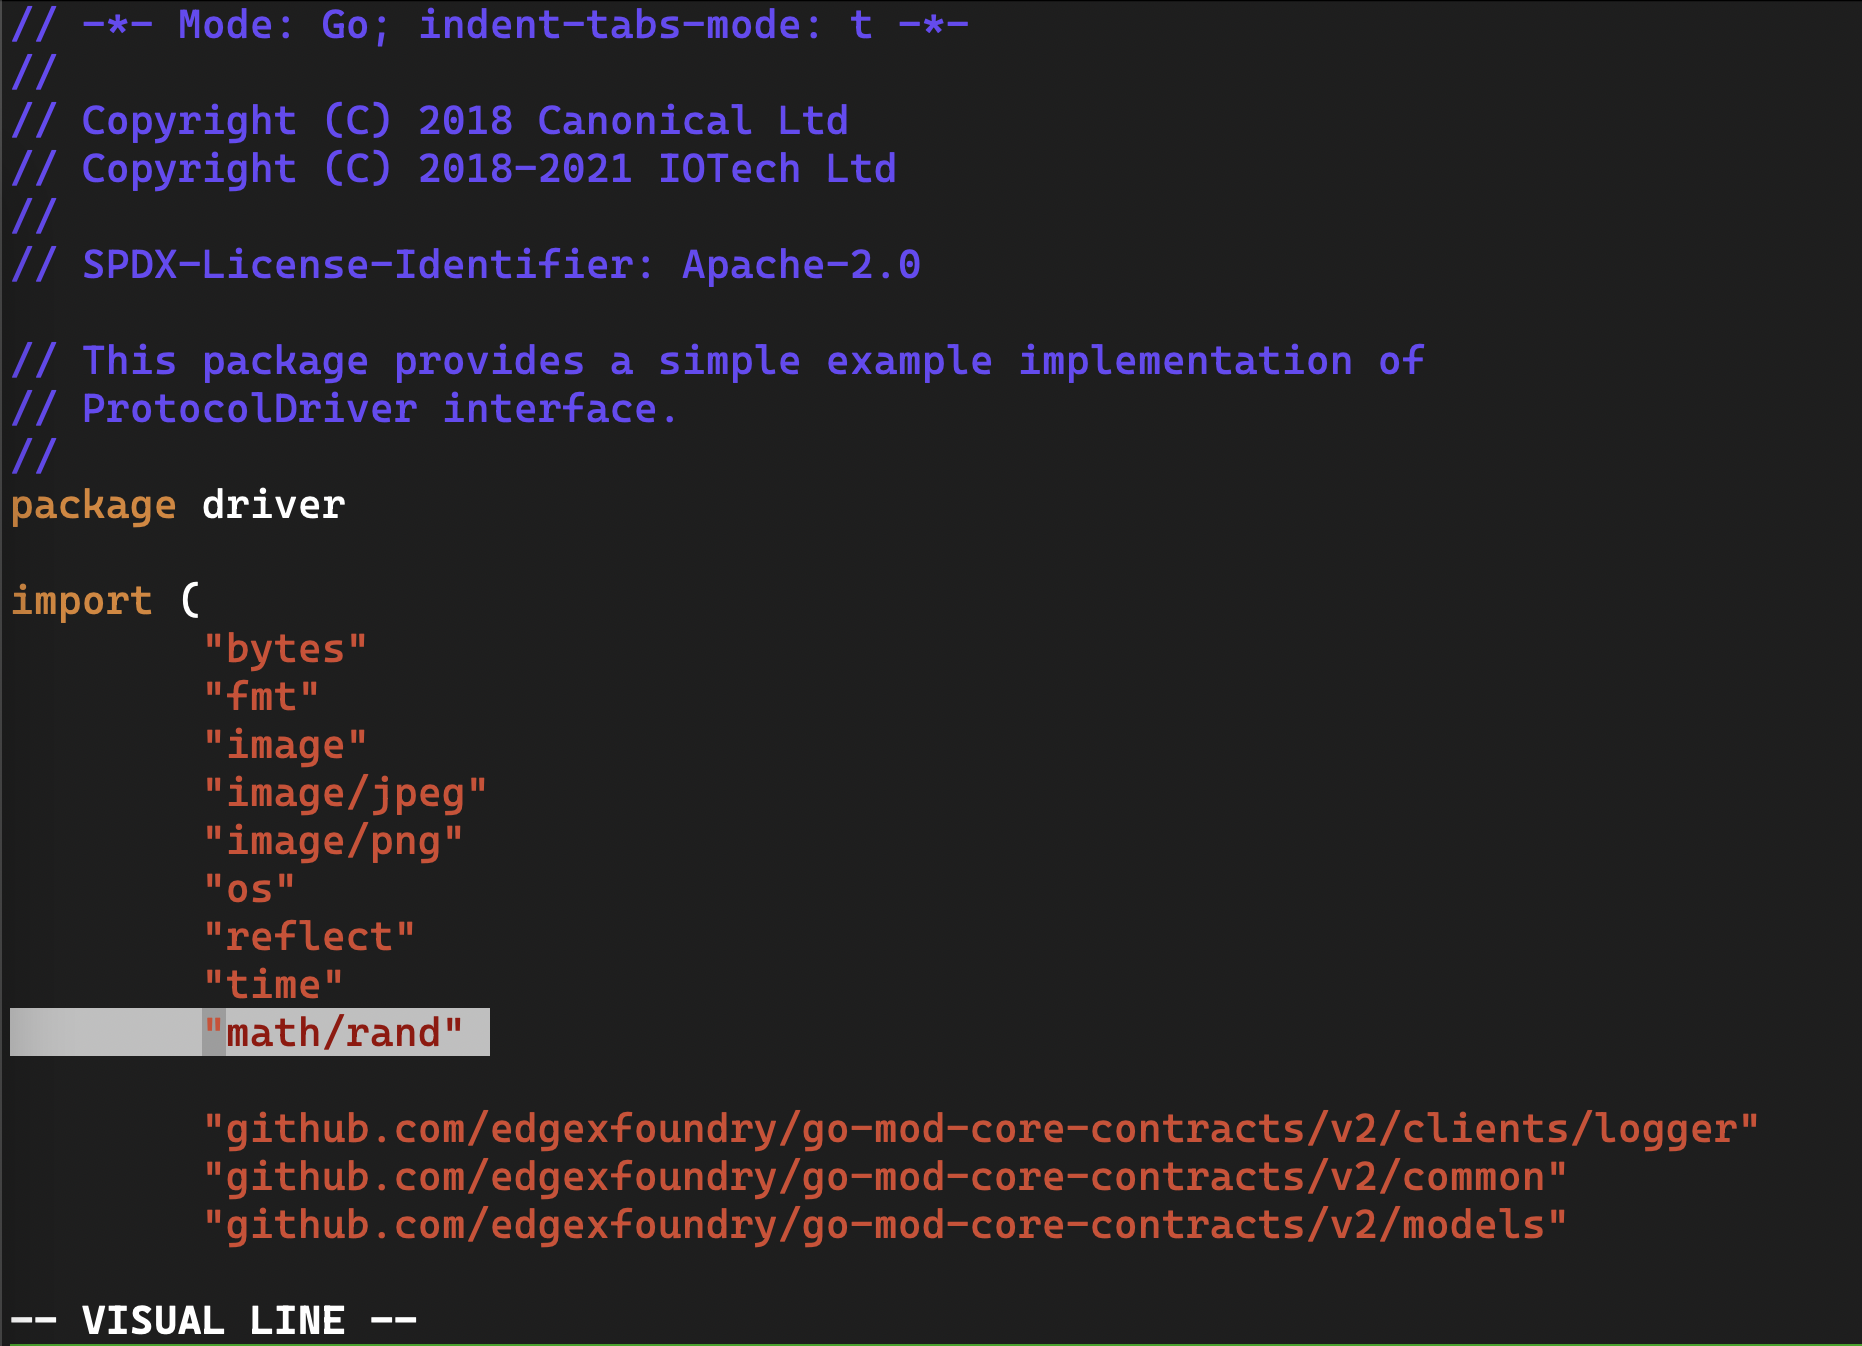
Locate the simpledriver.go file in the /driver folder and open it with your favorite editor.

-
In the import() area at the top of the file, add "math/rand" under "time".
-
Locate the HandleReadCommands() function in this same file (simpledriver.go). Find the following lines of code in this file (around line 139):
if reqs[0].DeviceResourceName == "SwitchButton" {
    cv, _ := sdkModels.NewCommandValue(reqs[0].DeviceResourceName, common.ValueTypeBool, s.switchButton)
    res[0] = cv
}
Add the conditional (if-else) code in front of the above conditional:
if reqs[0].DeviceResourceName == "randomnumber" {
    cv, _ := sdkModels.NewCommandValue(reqs[0].DeviceResourceName, common.ValueTypeInt32, int32(rand.Intn(100)))
    res[0] = cv
} else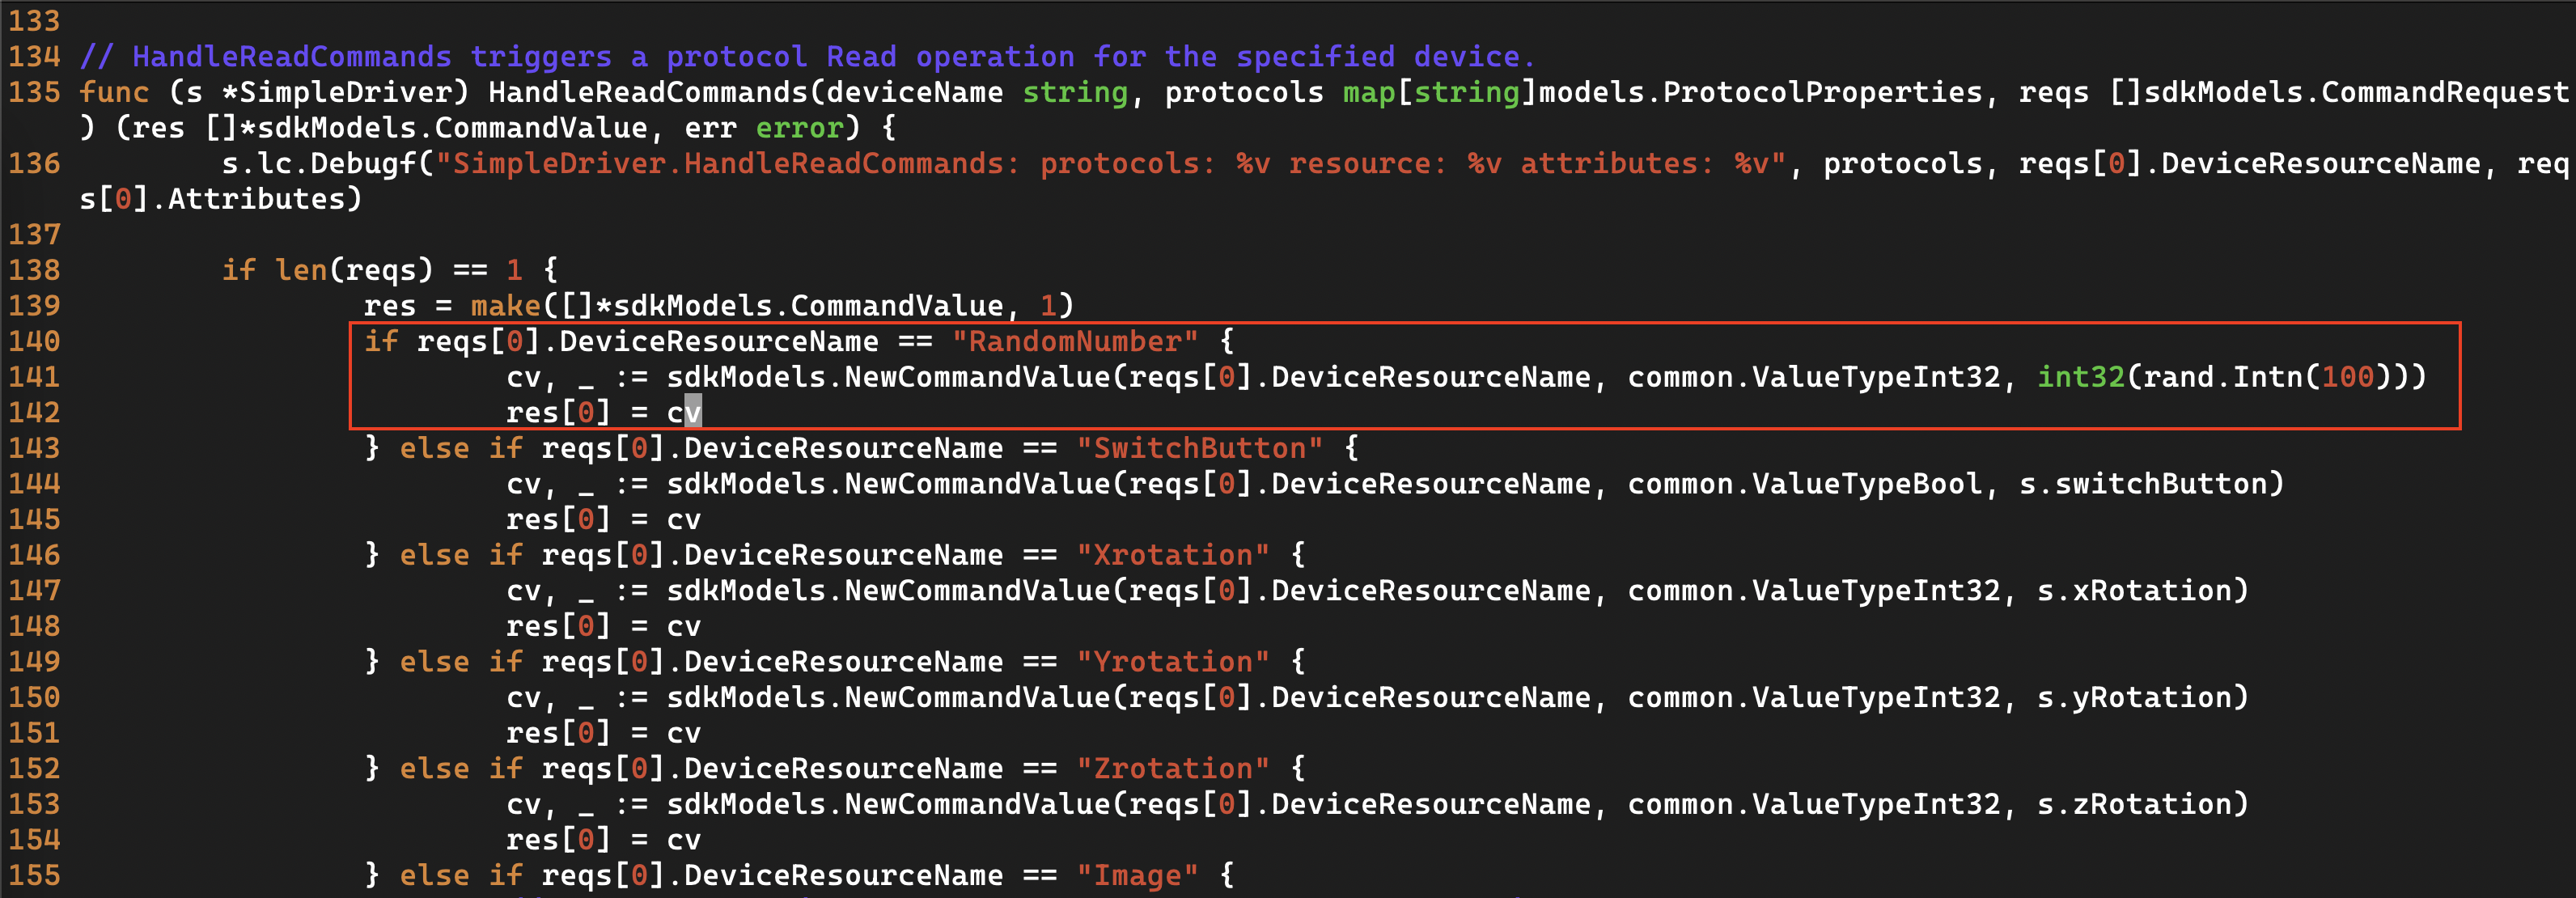
The first line of code checks that the current request is for a resource called "RandomNumber". The second line of code generates an integer (between 0 and 100) and uses that as the value the device service sends to EdgeX -- mimicking the collection of data from a real device. It is here that the device service would normally capture some sensor reading from a device and send the data to EdgeX. The HandleReadCommands is where you'd need to do some customization work to talk to the device, get the latest sensor values and send them into EdgeX.
-
Save the simpledriver.go file
Creating your Device Profile
A device profile is a YAML file that describes a class of device to EdgeX. General characteristics about the type of device, the data these devices provide, and how to command the device are all in a device profile. The device profile tells the device service what data gets collected from the the device and how to get it.
Follow these steps to create a device profile for the simple random number generating device service.
-
Explore the files in the cmd/device-simple/res/profiles folder. Note the example Simple-Driver.yaml device profile that is already in this folder. Open the file with your favorite editor and explore its contents. Note how
deviceResourcesin the file represent properties of a device (properties like SwitchButton, X, Y and Z rotation).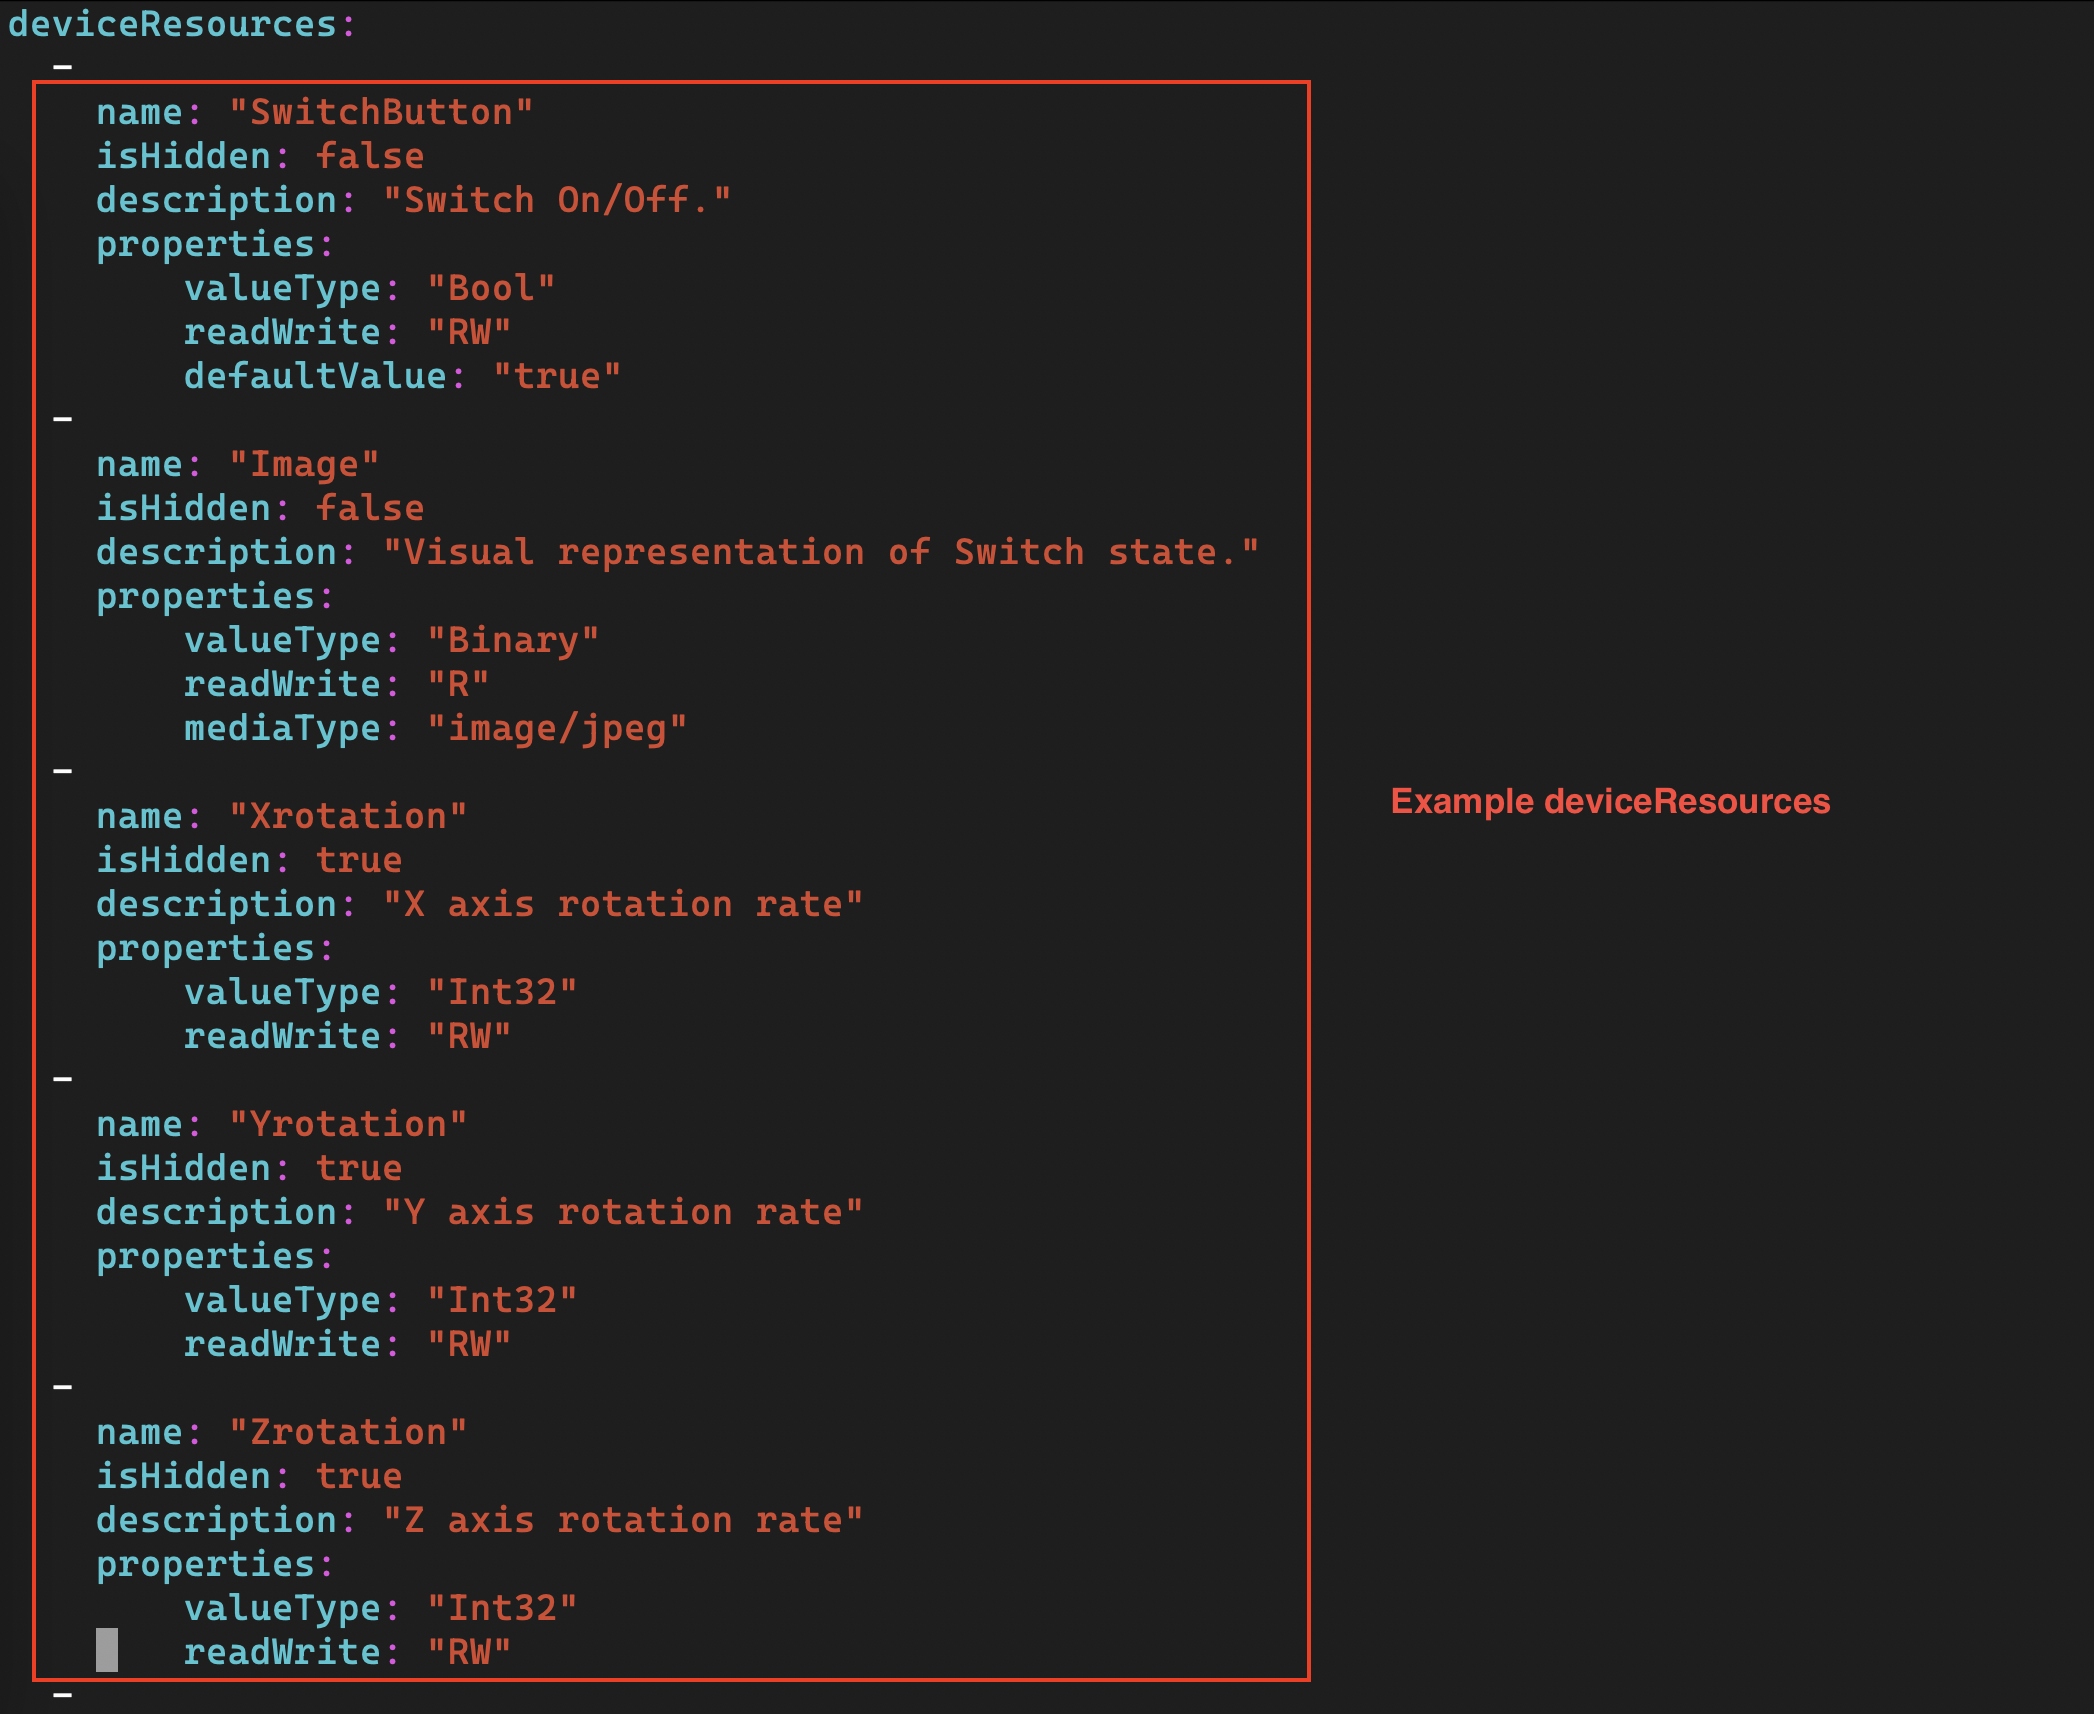
-
A pre-created device profile for the random number device is provided in this documentation. Download random-generator-device.yaml and save the file to the
~/edgexfoundry/device-simple/cmd/device-simple/res/profilesfolder. -
Open the random-generator-device.yaml file in a text editor. In this device profile, the device described has a deviceResource:
RandomNumber. Note how the association of a type to the deviceResource. In this case, the device profile informs EdgeX that RandomNumber will be a INT32. In real world IoT situations, this deviceResource list could be extensive. Rather than a single deviceResource, you might find this section filled with many deviceResources and each deviceResource associated to a different type.
Creating your Device
Device Service accepts pre-defined devices to be added to EdgeX during device service startup.
Follow these steps to create a pre-defined device for the simple random number generating device service.
-
Explore the files in the cmd/device-simple/res/devices folder. Note the example simple-device.toml that is already in this folder. Open the file with your favorite editor and explore its contents. Note how
DeviceListin the file represent an actual device with its properties (properties like Name, ProfileName, AutoEvents). -
A pre-created device for the random number device is provided in this documentation. Download random-generator-device.toml and save the file to the
~/edgexfoundry/device-simple/cmd/device-simple/res/devicesfolder. -
Open the random-generator-device.toml file in a text editor. In this example, the device described has a ProfileName:
RandNum-Device. In this case, the device informs EdgeX that it will be using the device profile we created in Creating your Device Profile
Validating your Device
Go Device Services provide /api/v2/validate/device API to validate device's ProtocolProperties.
This feature allows Device Services whose protocol has strict rule to validate their devices before adding them into EdgeX.
Go SDK provides DeviceValidator interface:
// DeviceValidator is a low-level device-specific interface implemented
// by device services that validate device's protocol properties.
type DeviceValidator interface {
    // ValidateDevice triggers device's protocol properties validation, returns error
    // if validation failed and the incoming device will not be added into EdgeX.
    ValidateDevice(device models.Device) error
}
By implementing DeviceValidator interface whenever a device is added or updated,
ValidateDevice function will be called to validate incoming device's ProtocolProperties and reject
the request if validation failed.
Configuring your Device Service
Now update the configuration for the new device service. This documentation provides a new configuration.toml file. This configuration file:
- changes the port the service operates on so as not to conflict with other device services
Download configuration.toml and save the file to the ~/edgexfoundry/device-simple/cmd/device-simple/res folder (overwrite the existing configuration file). Change the host address of the device service to your system's IP address.
Warning
In the configuration.toml, change the host address (around line 14) to the IP address of the system host. This allows core metadata to callback to your new device service when a new device is created. Because the rest of EdgeX, to include core metadata, will be running in Docker, the IP address of the host system on the Docker network must be provided to allow metadata in Docker to call out from Docker to the new device service running on your host system.
Custom Structured Configuration
EdgeX 2.0
New for EdgeX 2.0
Go Device Services can now define their own custom structured configuration section in the configuration.toml file. Any additional sections in the TOML are ignored by the SDK when it parses the file for the SDK defined sections.
This feature allows a Device Service to define and watch it's own structured section in the service's TOML configuration file.
The SDK API provides the follow APIs to enable structured custom configuration:
-
LoadCustomConfig(config UpdatableConfig, sectionName string) errorLoads the service's custom configuration from local file or the Configuration Provider (if enabled). The Configuration Provider will also be seeded with the custom configuration the first time the service is started, if service is using the Configuration Provider. The
UpdateFromRawinterface will be called on the custom configuration when the configuration is loaded from the Configuration Provider. -
ListenForCustomConfigChanges(configToWatch interface{}, sectionName string, changedCallback func(interface{})) errorStarts a listener on the Configuration Provider for changes to the specified section of the custom configuration. When changes are received from the Configuration Provider the UpdateWritableFromRaw interface will be called on the custom configuration to apply the updates and then signal that the changes occurred via changedCallback.
See the Device MQTT Service for an example of using the new Structured Custom Configuration capability.
- See here for defining the structured custom configuration
- See here for custom section on the configuration.toml file
- See here for loading, validating and watching the configuration
Device Service Metrics
EdgeX 2.3
Device Service Metrics are new in EdgeX 2.3, but currently only for the Go SDK
Built-In
The following built-in device service metrics are collected by the Device SDK
- EventSent - Number of Events that have been sent from the Device Service
- ReadingsSent - Number of Reading that have been sent from the Device Service
- Common Metrics - Set of service metrics common to all EdgeX Services. See Common Service Metrics for list of all these metrics.
See Device Service Configuration Properties for detail on configuring device service metrics
Custom
The Custom Device Service Metrics capability allows for device service developers to define, collect and report their own service metrics beyond the common built-in service metrics supplied by the Device SDK.
The following are the steps to collect and report service metrics:
-
Determine the metric type that needs to be collected
counter- Track the integer count of somethinggauge- Track the integer value of somethinggaugeFloat64- Track the float64 value of somethingtimer- Track the time it takes to accomplish a taskhistogram- Track the integer value variance of something
-
Create instance of the metric type from
github.com/rcrowley/go-metricsmyCounter = gometrics.NewCounter()myGauge = gometrics.NewGauge()myGaugeFloat64 = gometrics.NewGaugeFloat64()myTimer = gometrics.NewTime()myHistogram = gometrics.NewHistogram(gometrics.NewUniformSample(<reservoir size))
-
Determine if there are any tags to report along with your metric. Not common so
nilis typically passed for thetags map[strings]stringparameter in the next step. -
Register your metric(s) with the MetricsManager from the
sdkreference. See Device SDK API for more details: -
service.MetricsManager().Register("MyCounterName", myCounter, nil) -
Collect the metric
myCounter.Inc(someIntvalue)myCounter.Dec(someIntvalue)myGauge.Update(someIntvalue)myGaugeFloat64.Update(someFloatvalue)myTimer.Update(someDuration)myTimer.Time(func { do sometime})myTimer.UpdateSince(someTimeValue)myHistogram.Update(someIntvalue)
-
Configure reporting of the service's metrics. See
Writable.Telemetryconfiguration details in the Common Configuration section for more detail.
!!! example "Example - Service Telemetry Configuration"
  [Writable.Telemetry]
  Interval = "30s"
  PublishTopicPrefix  = "edgex/telemetry" # /<service-name>/<metric-name> will be added to this Publish Topic prefix
    [Writable.Telemetry.Metrics] # All service's metric names must be present in this list.
    MyCounterName = true
    MyGaugeName = true
    MyGaugeFloat64Name = true
    MyTimerName = true
    MyHistogram = true
       [Writable.Telemetry.Tags] # Contains the service level tags to be attached to all the service's metrics
   #    Gateway="my-iot-gateway" # Tag must be added here or via Consul Env Override can only change existing value, not added new ones.
   ```
!!! note The metric names used in the above configuration (to enable or disable reporting of a metric) must match the metric name used when the metric is registered. A partial match of starts with is acceptable, i.e. the metric name registered starts with the above configured name.
Retrieving Secrets
The Go Device SDK provides the SecretProvider.GetSecret() API to retrieve the Device Services secrets. See the Device MQTT Service for an example of using the SecretProvider.GetSecret() API. Note that this code implements a retry loop allowing time for the secret(s) to be push into the service's SecretStore via the /secret endpoint. See Storing Secrets section for more details.
Rebuild your Device Service
Just as you did in the Build your Device Service step above, build the device-simple service, which creates the executable program that is your device service. In a terminal window, make sure you are in the device-simple folder (the folder containing the Makefile). Build the service by issuing the following command:
cd ~/edgexfoundry/device-simple
make build

If there are no errors, your service is created and put in the
~/edgexfoundry/device-simple/cmd/device-simple folder. Look for the device-simple executable in the folder.
Run your Device Service
Allow the newly created device service, which was formed out of the Device Service Go SDK, to create sensor-mimicking data that it then sends to EdgeX:
-
Follow the Getting Started using Docker guide to start all of EdgeX. From the folder containing the docker-compose file, start EdgeX with the following call (we're using non-security EdgeX in this example):
docker-compose -f docker-compose-no-secty.yml up -d -
In a terminal window, change directories to the device-simple's cmd/device-simple folder and run the new device-simple service.
cd ~/edgexfoundry/device-simple/cmd/device-simple
./device-simple
This starts the service and immediately displays log entries in the terminal.
-
Using a browser, enter the following URL to see the event/reading data that the service is generating and sending to EdgeX:
http://localhost:59880/api/v2/event/device/name/RandNum-Device01
This request asks core data to provide the events associated to the RandNum-Device-01.