Camera Management Example App Service
Use the Camera Management Example application service to auto discover and connect to nearby ONVIF and USB based cameras. This application will also control cameras via commands, create inference pipelines for the camera video streams and publish inference results to MQTT broker.
This app uses EdgeX compose, Edgex Onvif Camera device service, Edgex USB Camera device service, Edgex MQTT device service and Edge Video Analytics Microservice.
Install Dependencies
Environment
This example has been tested with a relatively modern Linux environment - Ubuntu 20.04 and later
Install Docker
Install Docker from the official repository as documented on the Docker site.
Configure Docker
To enable running Docker commands without the preface of sudo, add the user to the Docker group.
Warning
The docker group grants root-level privileges to the user. For details on how this impacts security in your system, see Docker Daemon Attack Surface.
-
Create Docker group:
sudo groupadd dockerNote
If the group already exists,
groupaddoutputs a message: groupadd: groupdockeralready exists. This is OK. -
Add User to group:
sudo usermod -aG docker $USER -
Restart your computer for the changes to take effect.
Verify Docker
To verify the Docker installation, run hello-world:
docker run hello-world
Unable to find image 'hello-world:latest' locally
latest: Pulling from library/hello-world
2db29710123e: Pull complete
Digest: sha256:10d7d58d5ebd2a652f4d93fdd86da8f265f5318c6a73cc5b6a9798ff6d2b2e67
Status: Downloaded newer image for hello-world:latest

Hello from Docker!
This message shows that your installation appears to be working correctly.
...
Install Docker Compose
Install Docker Compose from the official repository as documented on the Docker Compose site.
Install Golang
Install Golang from the official Golang website.
Install Tools
Install build tools:
sudo apt install build-essential
Steps for running this example:
1. Start the EdgeX Core Services and Device Services.
-
Clone
edgex-composefrom github.com.git clone https://github.com/edgexfoundry/edgex-compose.git -
Navigate to the
edgex-composedirectory:cd edgex-compose -
Checkout the latest release (v3.0):
git checkout v3.0 -
Navigate to the
compose-buildersubdirectory:cd compose-builder/ -
(Optional) Update the
add-device-usb-camera.ymlfile:Note
This step is only required if you plan on using USB cameras.
a. Add the rtsp server hostname environment variable to the
device-usb-cameraservice, whereyour-local-ip-addressis the ip address of the machine running thedevice-usb-cameraservice.Snippet from
add-device-usb-camera.ymlservices: device-usb-camera: environment: DRIVER_RTSPSERVERHOSTNAME: "your-local-ip-address"b. Under the
portssection, find the entry for port 8554 and change the host_ip from127.0.0.1to either0.0.0.0or the ip address you put in the previous step. -
Clone the EdgeX Examples repository :
git clone https://github.com/edgexfoundry/edgex-examples.git -
Navigate to the
edgex-examplesdirectory:cd edgex-examples -
Checkout the latest release (v3.0):
git checkout v3.0 -
Navigate to the
application-services/custom/camera-managementdirectorycd application-services/custom/camera-management -
Configure device-mqtt service to send Edge Video Analytics Microservice inference results into Edgex via MQTT
a. Copy the entire evam-mqtt-edgex folder into
edgex-compose/compose-builderdirectory.b. Add this information into the add-device-mqtt.yml file in the
edgex-compose/compose-builderdirectory.Snippet from add-device-mqtt.yml
services:
  device-mqtt:
    ...
    environment:
      DEVICE_DEVICESDIR: /evam-mqtt-edgex/devices
      DEVICE_PROFILESDIR: /evam-mqtt-edgex/profiles
      MQTTBROKERINFO_INCOMINGTOPIC: "incoming/data/#"
      MQTTBROKERINFO_USETOPICLEVELS: "true"
      ...
    ...
    volumes:
      # example: - /home/github.com/edgexfoundry/edgex-compose/compose-builder/evam-mqtt-edgex:/evam-mqtt-edgex
      - <add-absolute-path-of-your-edgex-compose-builder-here-example-above>/evam-mqtt-edgex:/evam-mqtt-edgex
c. Add this information into the add-mqtt-broker.yml file in the
edgex-compose/compose-builderdirectory.Snippet from add-mqtt-broker.yml
services:
  mqtt-broker:
    ...
    ports:
      ...
      - "59001:9001"
    ...
    volumes:
      # example: - /home/github.com/edgexfoundry/edgex-compose/compose-builder/evam-mqtt-edgex:/evam-mqtt-edgex
      - <add-absolute-path-of-your-edgex-compose-builder-here>/evam-mqtt-edgex/mosquitto.conf:/mosquitto-no-auth.conf:ro
Note
Please note that both the services in this file need the absolute path to be inserted for their volumes.
-
Run the following command to start all the Edgex services.
Note
The
ds-onvif-cameraparameter can be omitted if no Onvif cameras are present, or theds-usb-cameraparameter can be omitted if no usb cameras are present.make run no-secty ds-mqtt mqtt-broker ds-onvif-camera ds-usb-camera
2. Start Edge Video Analytics Microservice running for inference.
-
Open cloned
edgex-examplesrepo and navigate to theedgex-examples/application-services/custom/camera-managementdirectory:cd edgex-examples/application-services/custom/camera-management -
Run this once to download edge-video-analytics into the edge-video-analytics sub-folder, download models, and patch pipelines
make install-edge-video-analytics
3. Build and run the example application service
3.1 (Optional) Configure Onvif Camera Credentials.
Note
This step is only required if you have Onvif cameras. Currently, this example app is limited to supporting only 1 username/password combination for all Onvif cameras.
Note
Please follow the instructions for the Edgex Onvif Camera device service in order to connect your Onvif cameras to EdgeX.
Modify the res/configuration.yaml file
InsecureSecrets:
  onvifauth:
    SecretName: onvifauth
    SecretData:
      username: "<username>"
      password: "<password>"
Export environment variable overrides
export WRITABLE_INSECURESECRETS_ONVIFAUTH_SECRETDATA_USERNAME="<username>"
export WRITABLE_INSECURESECRETS_ONVIFAUTH_SECRETDATA_PASSWORD="<password>"
3.2 (Optional) Configure USB Camera RTSP Credentials.
Note
This step is only required if you have USB cameras.
Note
Please follow the instructions for the Edgex USB Camera device service in order to connect your USB cameras to EdgeX.
Modify the res/configuration.yaml file
InsecureSecrets:
  rtspauth:
    SecretName: rtspauth
    SecretData:
      username: "<username>"
      password: "<password>"
Export environment variable overrides
export WRITABLE_INSECURESECRETS_RTSPAUTH_SECRETDATA_USERNAME="<username>"
export WRITABLE_INSECURESECRETS_RTSPAUTH_SECRETDATA_PASSWORD="<password>"
3.3 Configure Default Pipeline
Initially, all new cameras added to the system will start the default analytics pipeline as defined in the configuration file below. The desired pipeline can be changed or the feature can be disabled by setting the DefaultPipelineName and DefaultPipelineVersion to empty strings.
Modify the res/configuration.yaml file with the name and version of the default pipeline to use when a new device is added to the system.
Note
These values can be left empty to disable the feature.
AppCustom:
  DefaultPipelineName: object_detection # Name of the default pipeline used when a new device is added to the system; can be left blank to disable feature
  DefaultPipelineVersion: person # Version of the default pipeline used when a new device is added to the system; can be left blank to disable feature
3.4 Build and run
-
Make sure you are at the root of this example app
cd edgex-examples/application-services/custom/camera-management -
Build the docker image
make docker -
Start the docker compose services in the background for both EVAM and Camera Management App
docker compose up -d
Note
If you would like to view the logs for these services, you can use docker compose logs -f. To stop the services, use docker compose down.
Note
The port for EVAM result streams has been changed from 8554 to 8555 to avoid conflicts with the device-usb-camera service.
Using the App
Visit http://localhost:59750 to access the app.
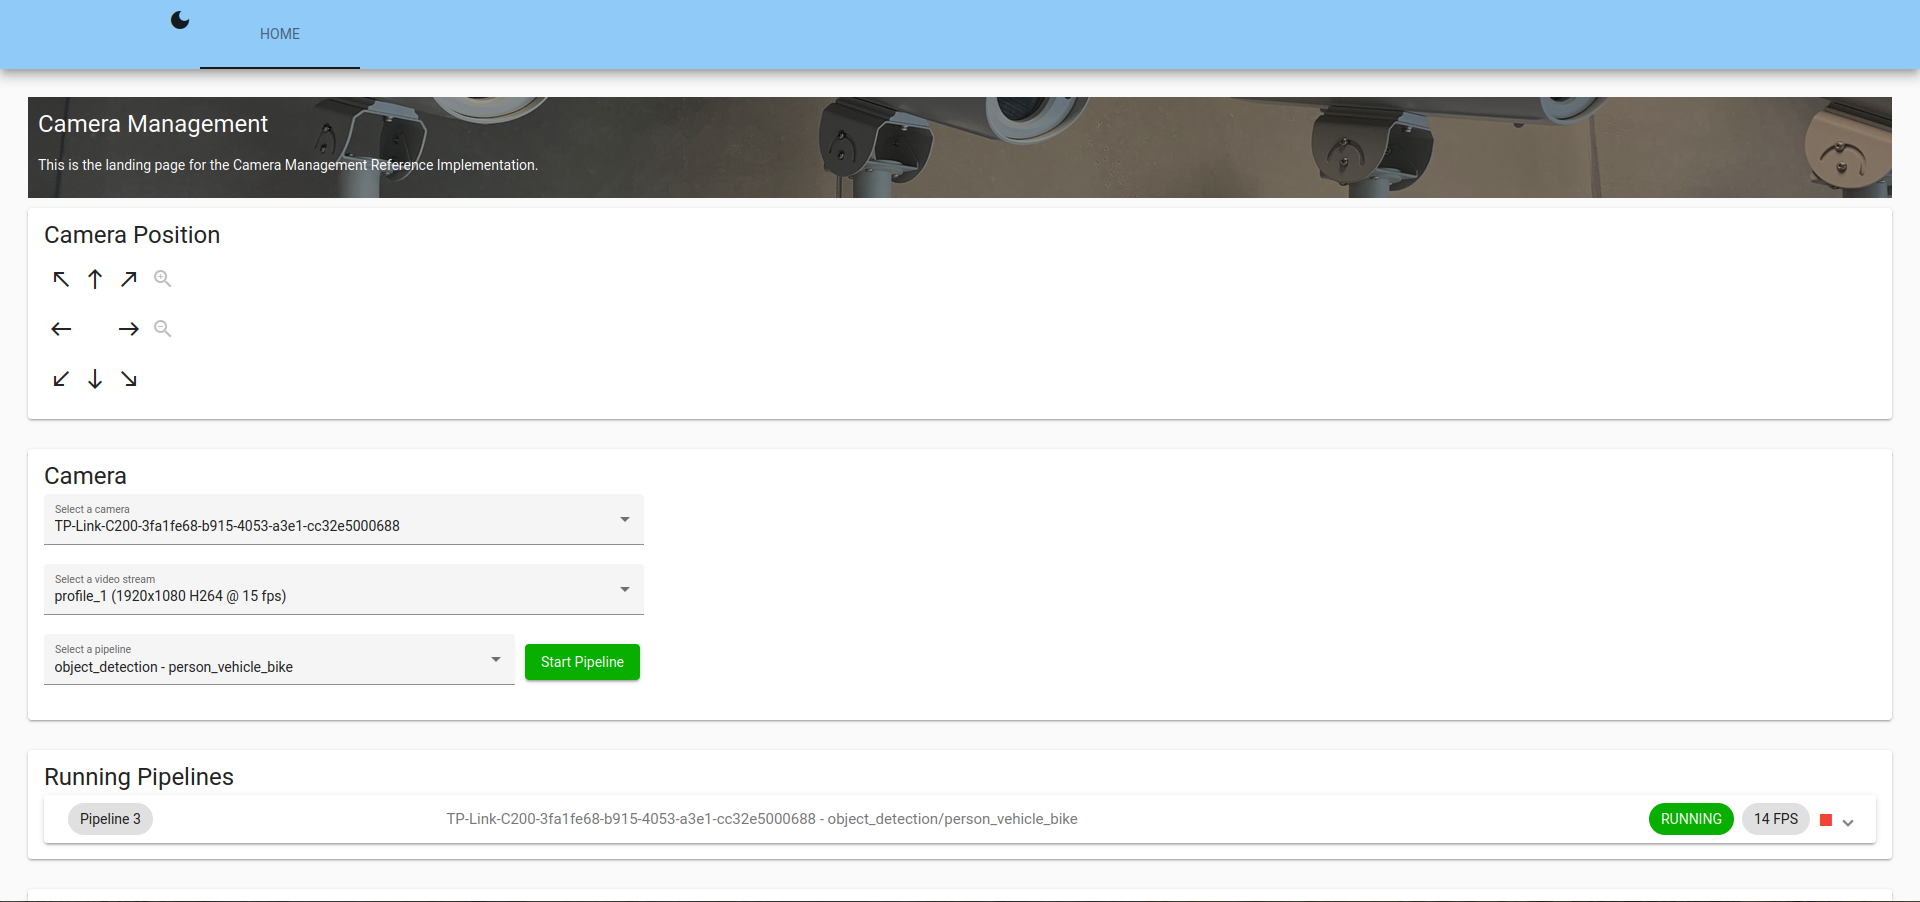
Figure 1: Homepage for the Camera Management app
Camera Position
You can control the position of supported cameras using ptz commands.
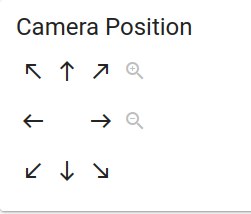
- Use the arrows to control the direction of the camera movement.
- Use the magnifying glass icons to control the camera zoom.
Start an Edge Video Analytics Pipeline
This section outlines how to start an analytics pipeline for inferencing on a specific camera stream.
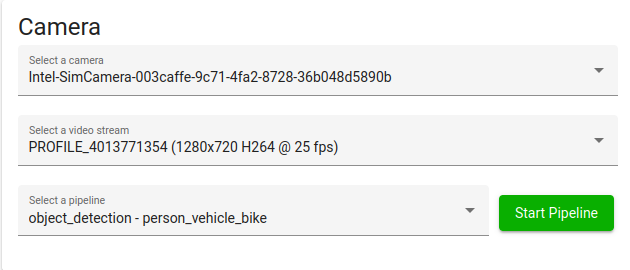
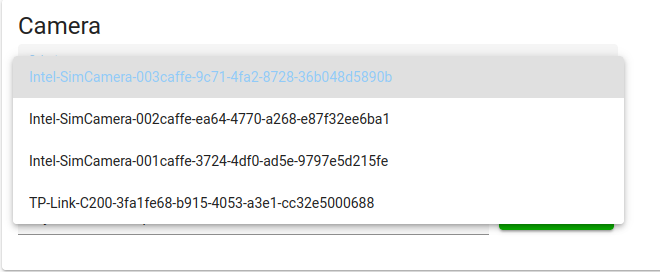
-
Select a camera out of the drop down list of connected cameras.
-
Select a video stream out of the drop down list of connected cameras.

-
Select a analytics pipeline out of the drop down list of connected cameras.
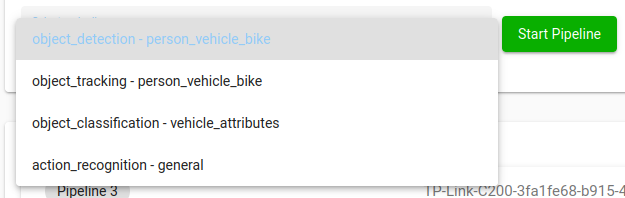
-
Click the
Start Pipelinebutton.
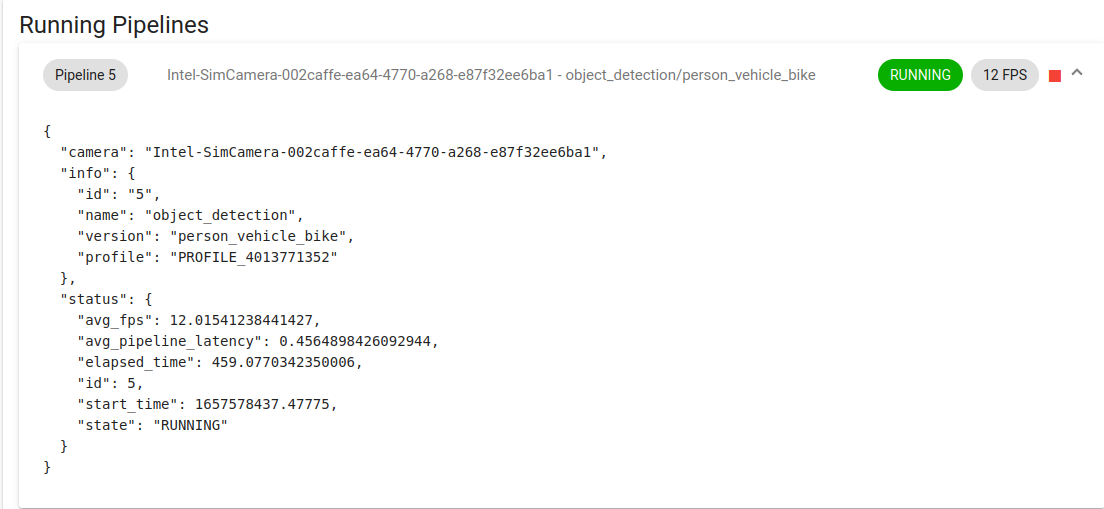
Running Pipelines
Once the pipeline is running, you can view the pipeline and its status.

Expand a pipeline to see its status. This includes important information such as elapsed time, latency, frames per second, and elapsed time.
In the terminal where you started the app, once the pipeline is started, this log message will pop up.
level=INFO ts=2022-07-11T22:26:11.581149638Z app=app-camera-management source=evam.go:115 msg="View inference results at 'rtsp://<SYSTEM_IP_ADDRESS>:8555/<device name>'"
Use the URI from the log to view the camera footage with analytics overlayed.
ffplay 'rtsp://<SYSTEM_IP_ADDRESS>:8555/<device name>'
Example Output:
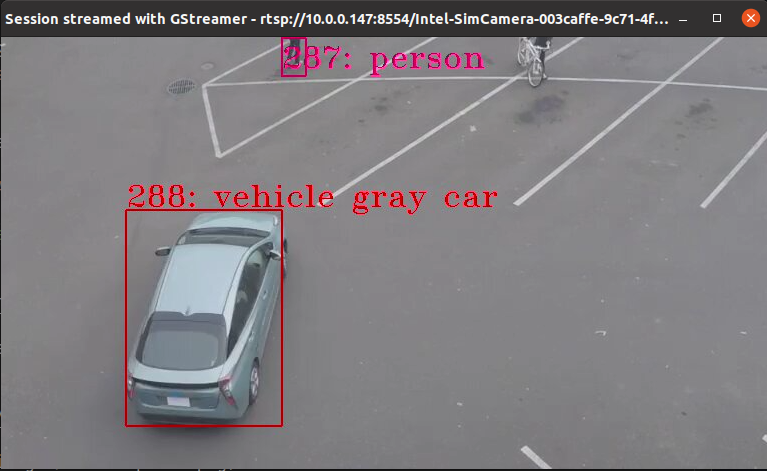
Figure 2: analytics stream with overlay
If you want to stop the stream, press the red square:

Figure 3: the red square to shut down the pipeline
API Log
The API log shows the status of the 5 most recent calls and commands that the management has made. This includes important information from the responses, including camera information or error messages.
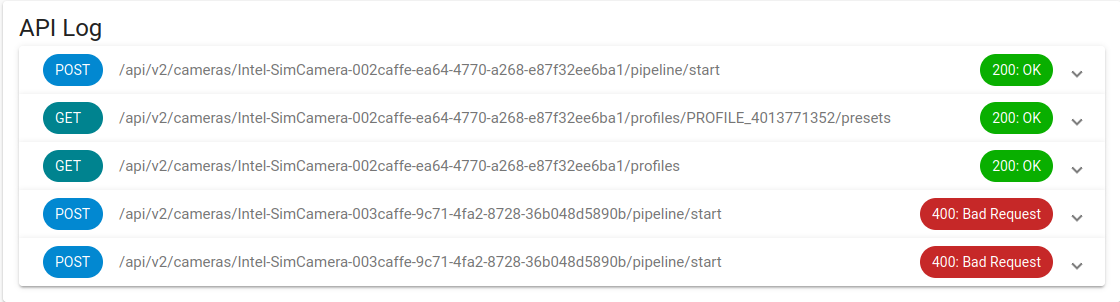
Expand a log item to see the response
Good response:

Bad response:

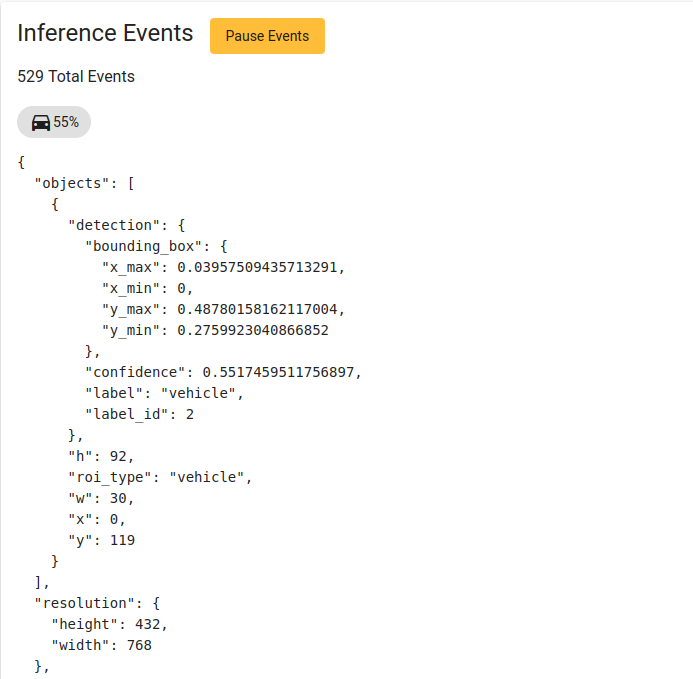
Inference Events

To view the inference events in a json format, click the Stream Events button.
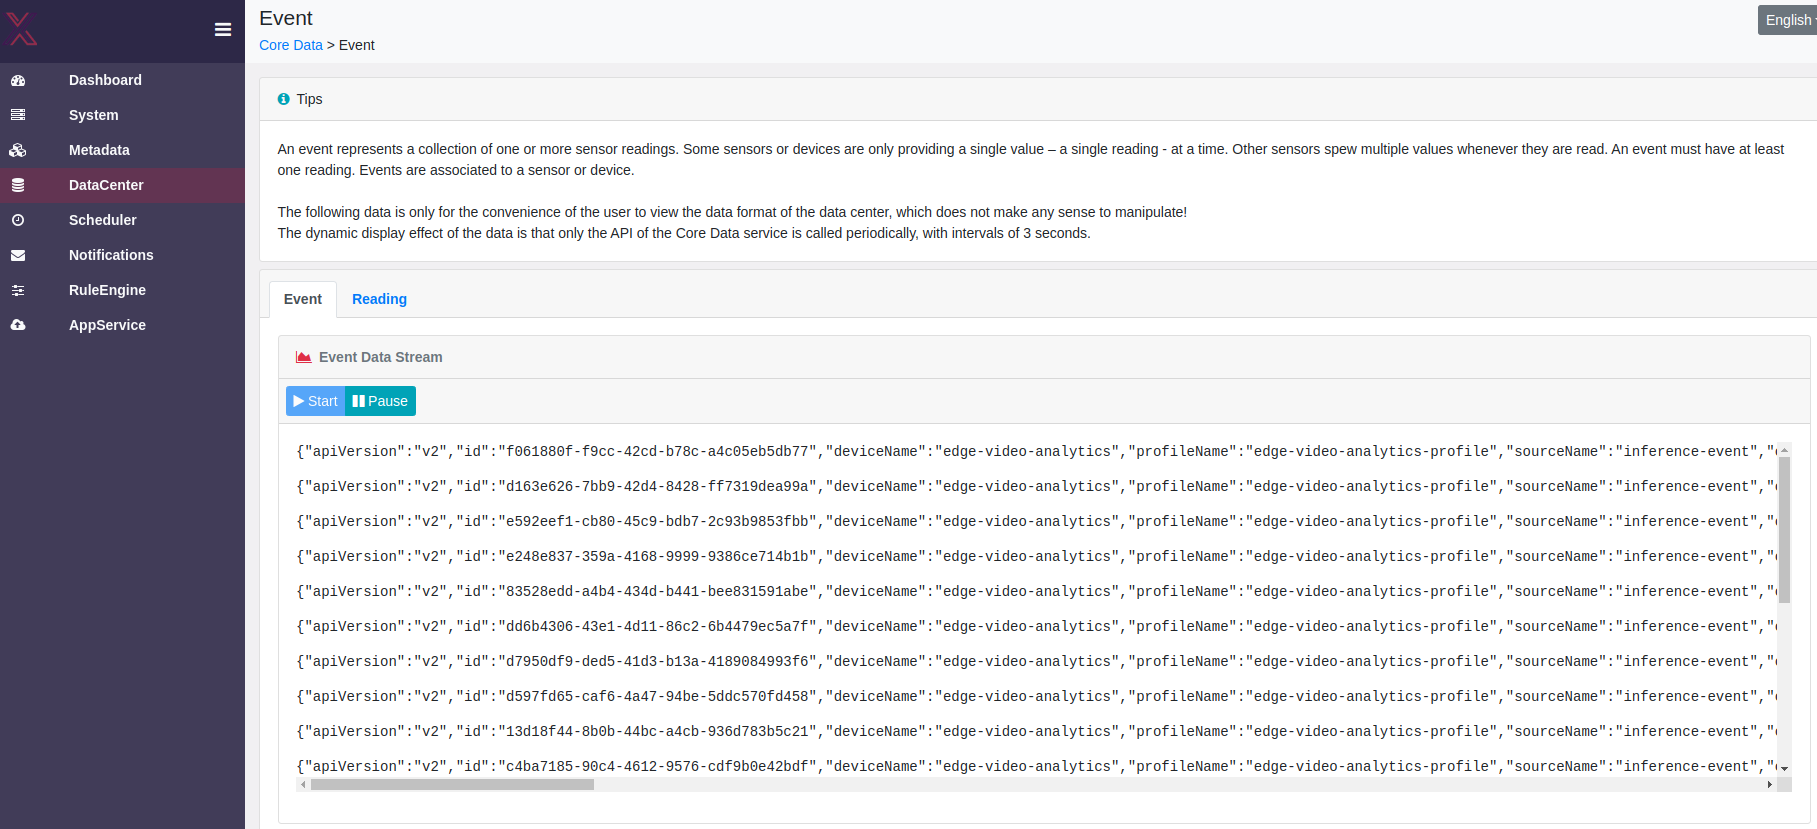
Inference results in Edgex
To view inference results in Edgex, open Edgex UI http://localhost:4000, click on the DataCenter
tab and view data streaming under Event Data Streamby clicking on the Start button.
Next steps
A custom app service can be used to analyze this inference data and take action based on the analysis.
Video Example
A brief video demonstration of building and using the device service:
Warning
This video was created with a previous release. Some new features may not be depicted in this video, and there might be some extra steps needed to configure the service.
Additional Development
Warning
The following steps are only useful for developers who wish to make modifications to the code and the Web-UI.
Development and Testing of UI
1. Build the production web-ui
This builds the web ui into the web-ui/dist folder, which is what is served by the app service on port 59750.
make web-ui
2. Serve the Web-UI in hot-reload mode
This will serve the web ui in hot reload mode on port 4200 which will recompile and update anytime you make changes to a file. It is useful for rapidly testing changes to the UI.
make serve-ui
Open your browser to http://localhost:4200